Business Process
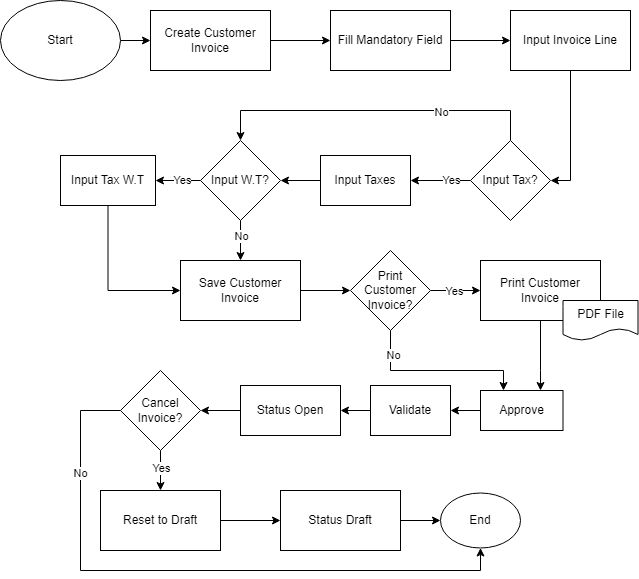
Import Customer Invoice
Here is the template used on import invoice process:

Invoice ID column should be filled with invoice reference number which helps the system to determine whether the each line will be uploaded as 1 invoice or as different invoice. If 2 or more lines should be uploaded in 1 invoice, make sure the Invoice ID column and Partner (Customer) column has the same value.
Notes: Invoice ID should be different each time invoice data uploaded, to avoid invoice line overlap with other invoice with the same Invoice ID.

Partner column should be filled with Customer name. Please make sure the customer name is the same as customer name in Odoo.
Currency column should be filled with the invoice currency.
Product column should be filled with the product name. Please make sure the product name is the same as product name in Odoo.
Quantity column should be filled with the quantity product in the invoice.
UoM column should be filled with the unit of measurement of the product.
Description column could be filled with product name or other description which is not the same as product name.
Price column should be filled with the price of the product.
Salesperson column should be filled with the salesperson name. The salesperson column is a mandatory field. Please make sure the name filled in the file should be the same as the account name in Odoo.
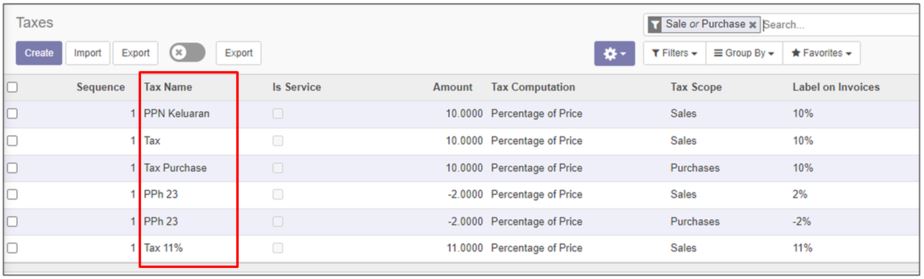
Tax column should be filled with the tax per product using the tax name in Odoo.
Date column filled with the invoice creation date.
The upload menu is in Invoicing > Sales > Import Invoice.
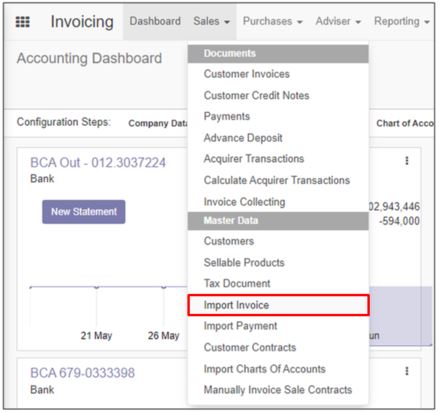
The system will display pop-up screen as below.
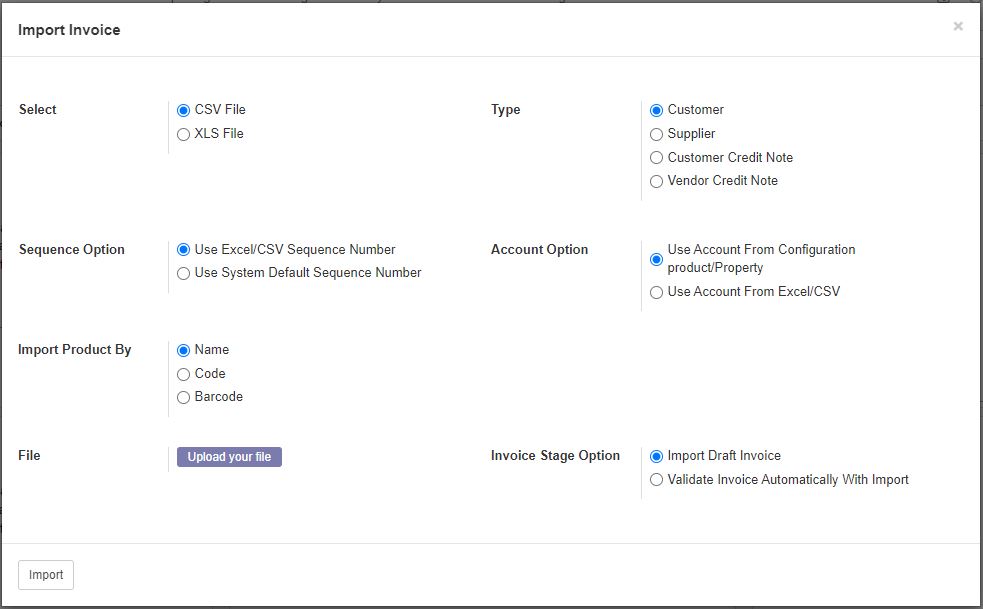
Here's the explanation for each section and options in the Import Invoice pop-up screen.
Select
The Select option available are CSV File and XLS File. This option define the file format we are going to upload.
Type
The Type option available are:
- Customer
- Supplier
- Customer Credit Note
- Vendor Credit Note
If the selected type is Customer, the system will create Customer Invoice (Account Receivable). If the selected type is Supplier, the system will create Vendor Bills (Account Payable). If the selected type is Customer Credit Note, the system will create invoice of Customer Credit Note. If the selected type is Vendor Credit Note, the system will create invoice of Vendor Credit Note.
Sequence Option
The Sequence option available are:
- Use Excel/CSV Sequence Number
- Use System Default Sequence Number
If the selected option is Use Excel/CSV Sequence Number, after the uploaded invoice validated, the invoice number and journal entry created will using the value in column Invoice ID. If the selected option is Use System Default Sequence Number, after the uploaded invoice validated, the invoice number and journal entry created will using the sequence number defined in journal.
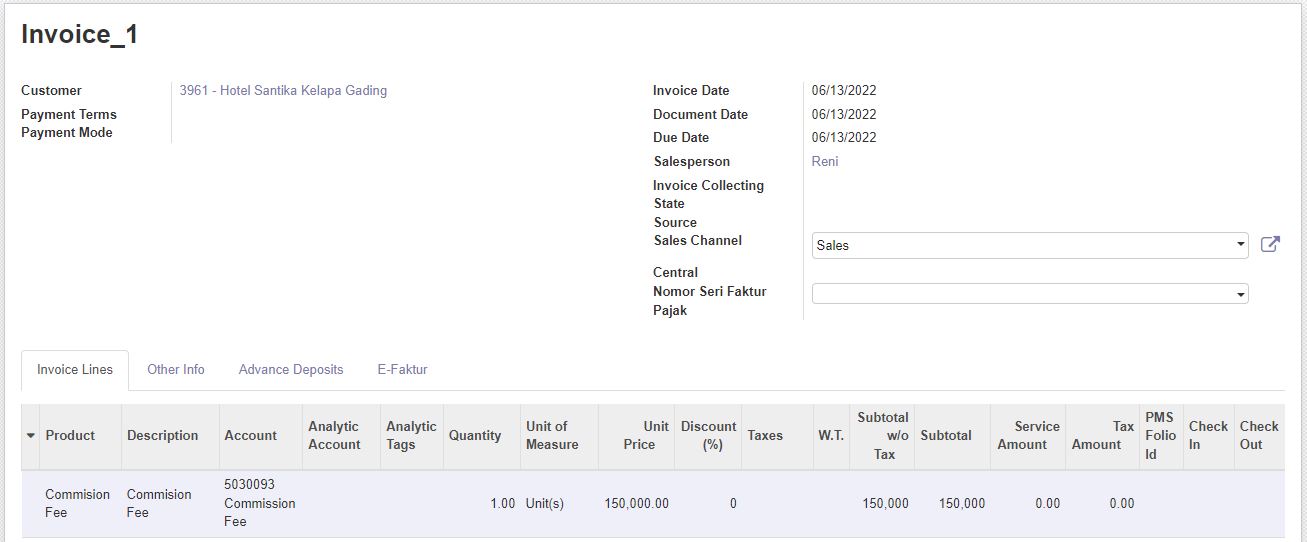
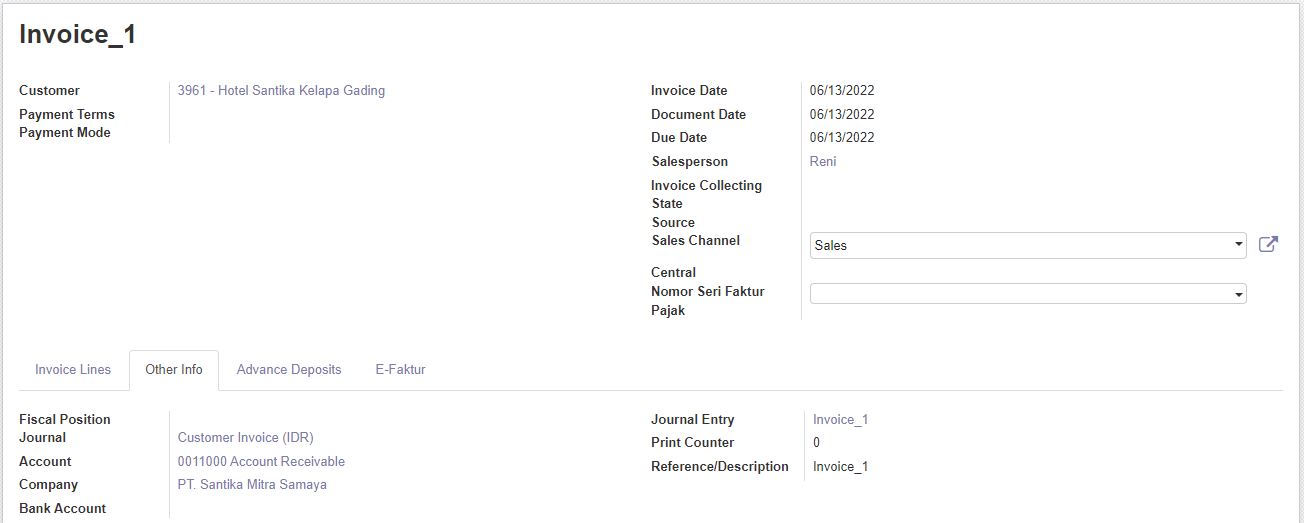
Here's an example of imported invoice with option using excel/csv sequence number:
Account Option
The Account option available are:
- Use Account from Configuration product/Property
- Use Account from Excel/CSV
If the selected option is Use Account from Configuration product/Property, the account selected on upload process will depends on Income Account settings set on Product or Product Category. If the selected option is Use Account from Excel/CSV, the account will be taken from uploaded file. The template should be:

The uploaded result:

Import Product By
The Import Product By option available are:
- Name
- Code
- Barcode
Invoice Stage Option
The Invoice Stage Option available are:
- Import Draft Invoice
- Validate Invoice Automatically With Import.
If selected option is Import Draft Invoice, the invoice status will be Draft. If the selected option is Validate Invoice Automatically With Import, the invoice uploaded will automatically validated.