User Guide
Upload Data for Corporate Executive Dashboard
Process Step by Step
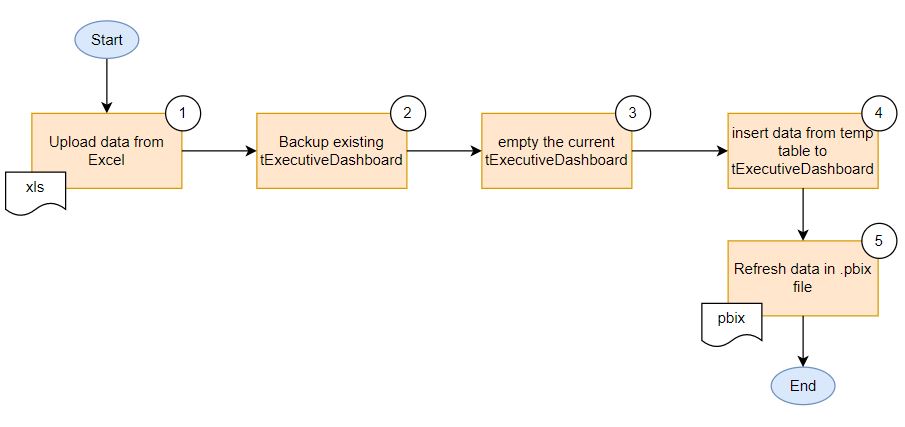
Download the latest data from Corporate Comptroller which uploaded to sharepoint.
Open the Excel file (.xlsx)
Divide data from Sheet named "Data" into Excel file with format (.xls)
Delete data in column named Elim1, Elim2, Elim3.
Move the new Excel file into the server.
Open Microsoft SQL Server Management Studio. Log-in to the database using the provided credential.
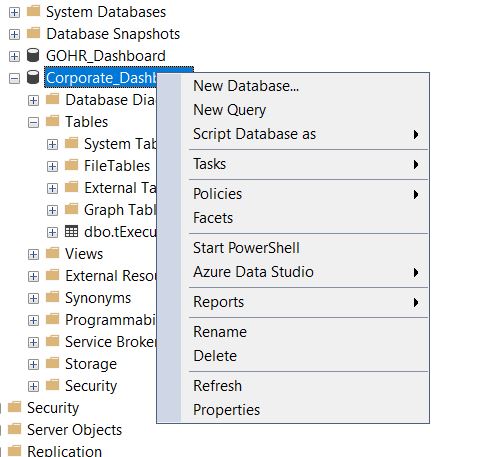
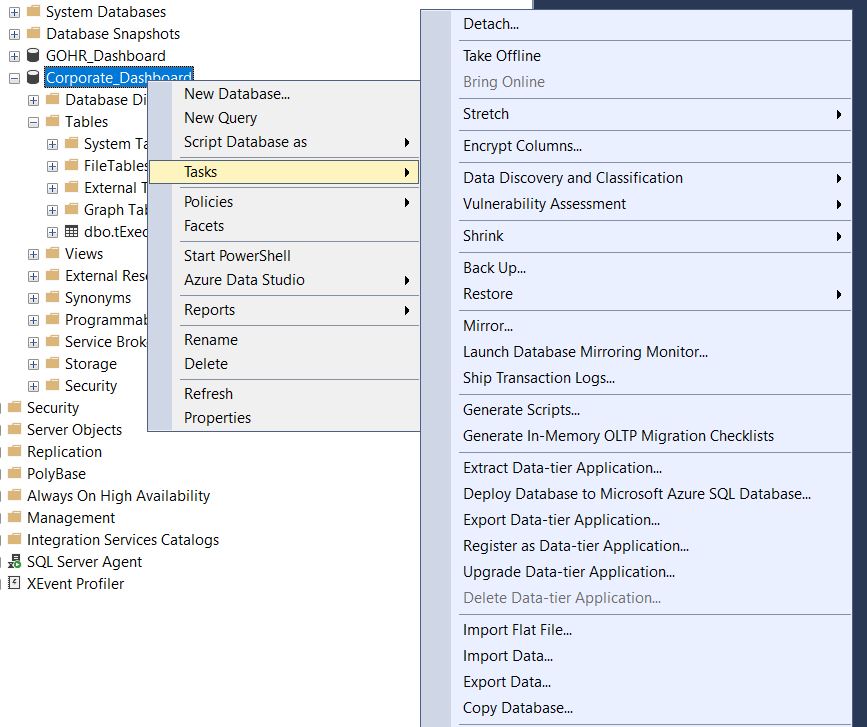
After successfully logged in to the database, select the database, then right-click on the database.
Select Task > Import Data
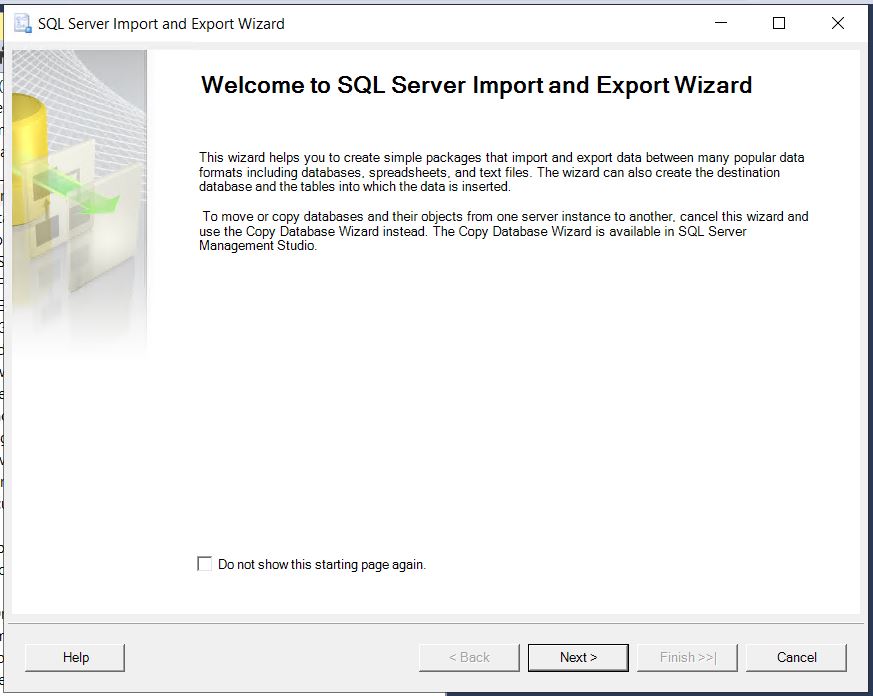
After click Import Data, the SSMS will display export wizard dialog to enable user import data from various source data. Click button [Next]
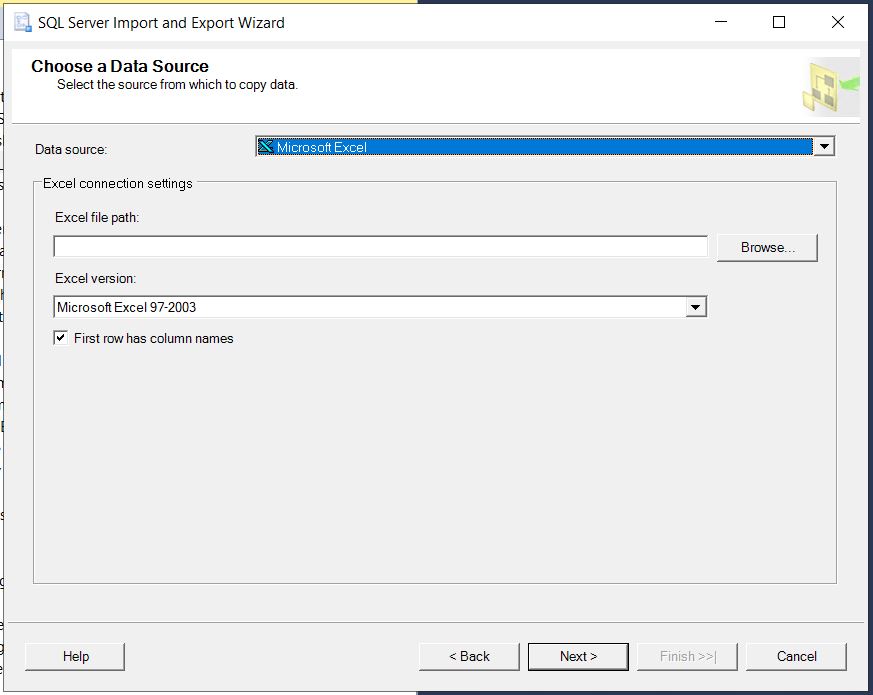
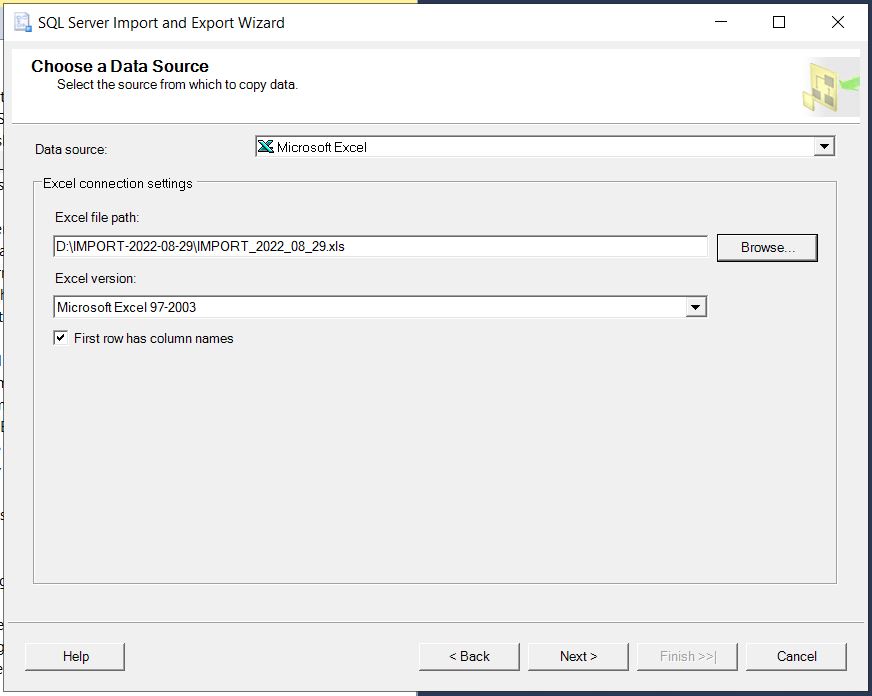
Choose data source, for data upload process, choose Microsoft Excel, and make sure the selected value for Excel version is Microsoft Excel 97-2003.
Select the excel files, click button [Next]
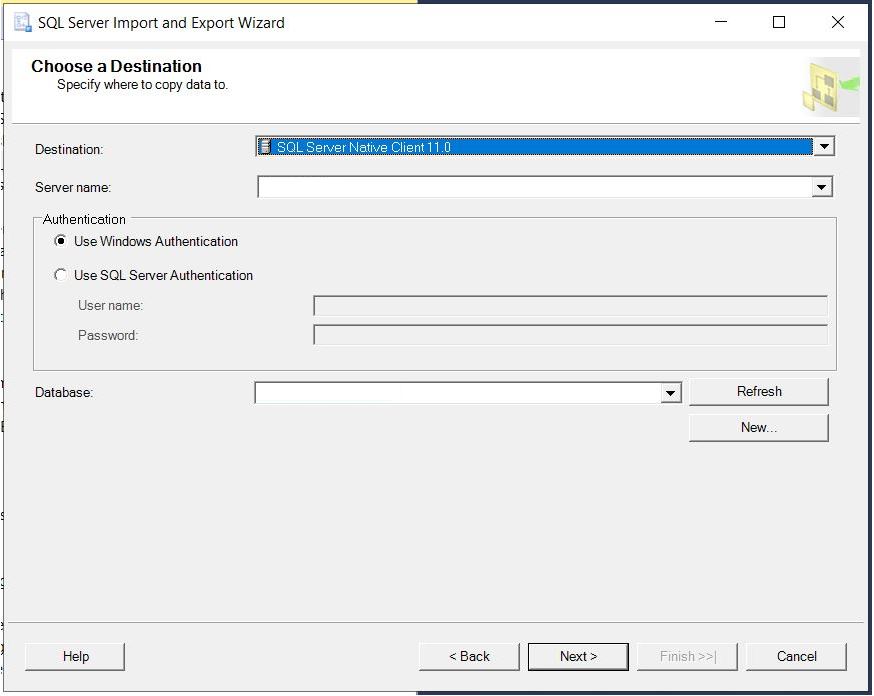
Choose the data destination. The selected value for Destination should be SQL Server Native Client 11.0. The server name will automatically filled, and make sure the Authentication selection is Use Windows Authentication and selected Database is Corporate_Dashboard. Click button [Next]
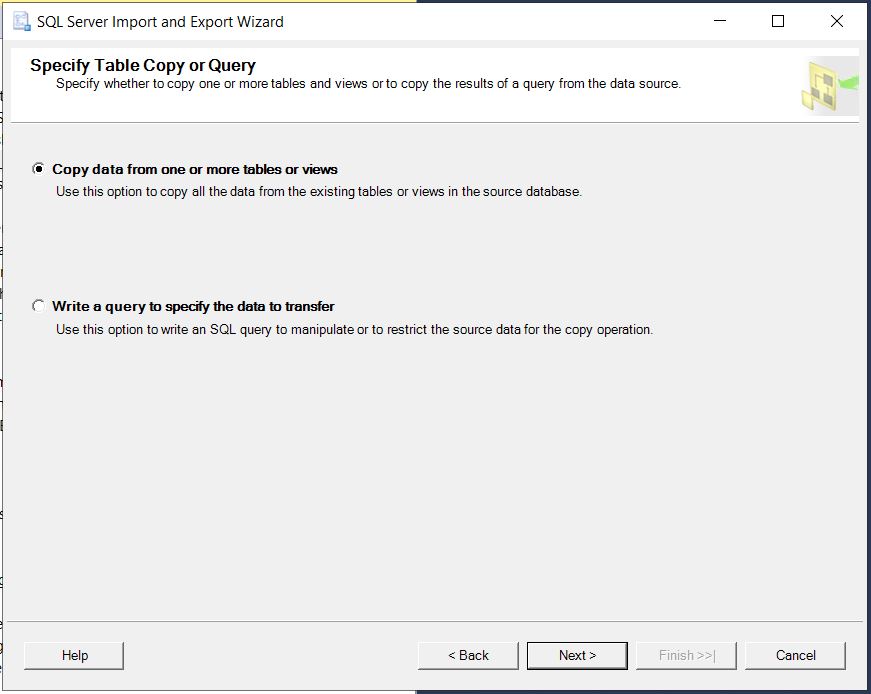
Select option of Copy data from one or more tables or views. Click button [Next]
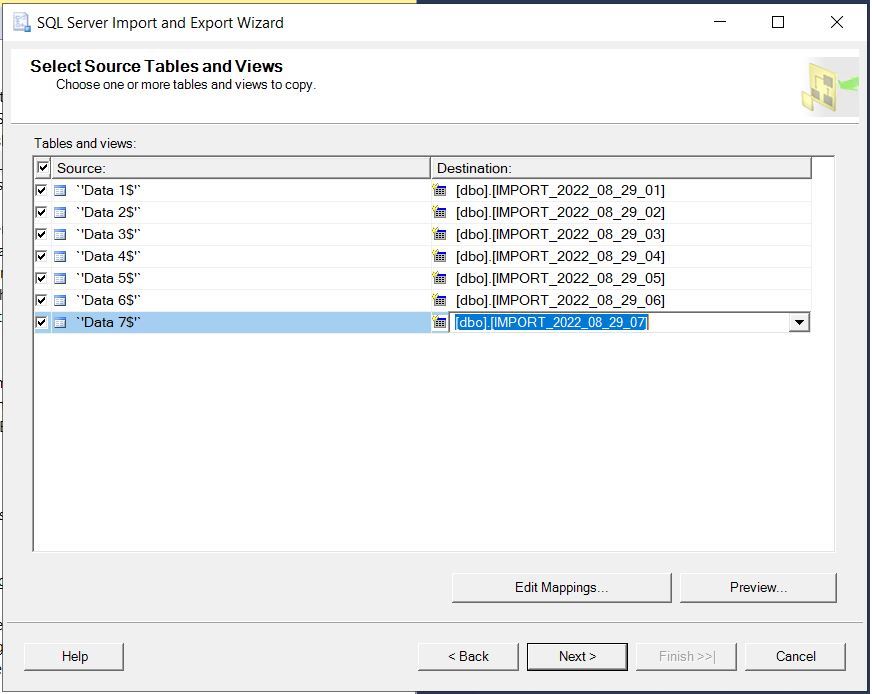
Check each tab name available on the Import and Export Wizard. Rename the destination column. The destination column will be the name of the table in the database. Click button [Next]
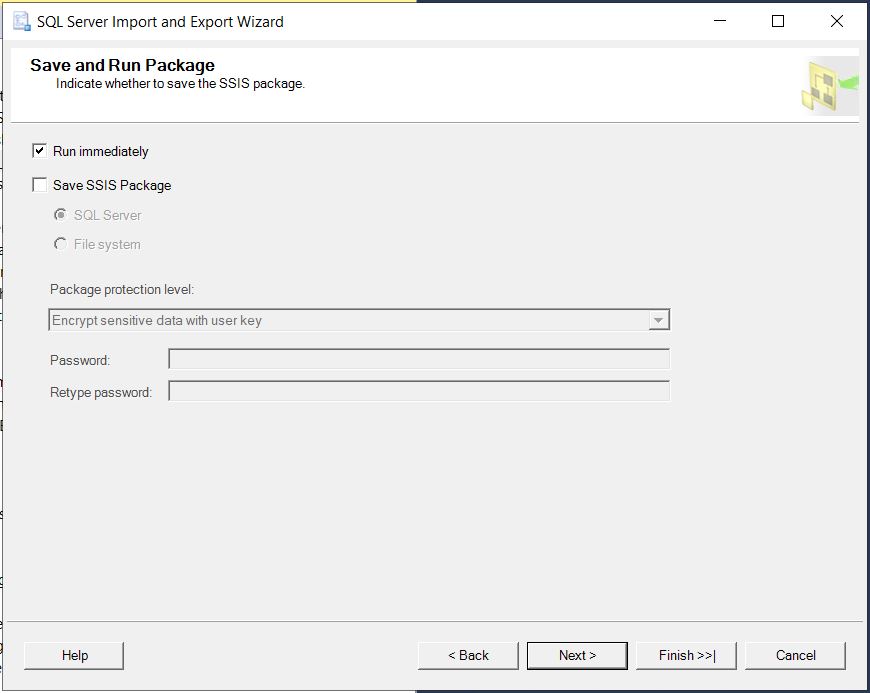
Check the Run immediately check box, click button [Next]
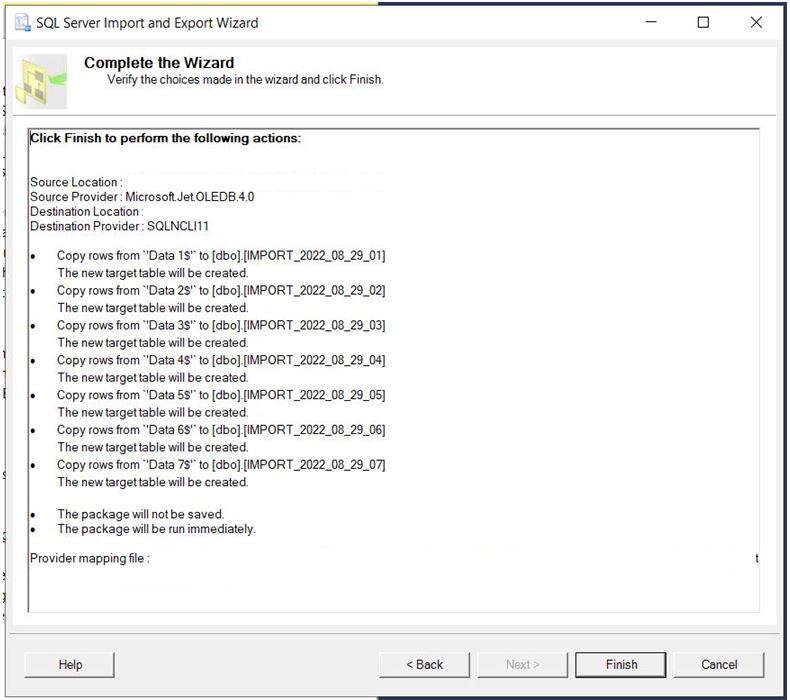
Check that the rows data copied are going to the right table in the database. Click button [Finish]
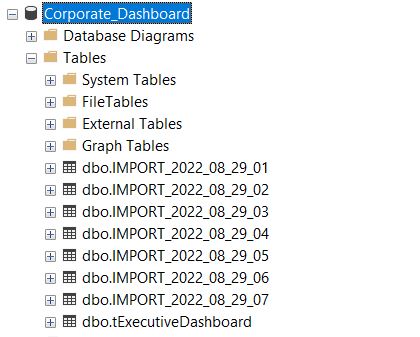
After finish with the import data process, execute the SQL scripts.
Open the PBIX (.pbix) file in the server. The file named Executive Dashboard Live. The file shortcut will be available on server's desktop.
On the menu bar, Queries section click icon [Refresh].
Please wait until the sync process data finished and the refresh dialog data closed, then click icon [Publish] on the menu bar.
